This article refers to an official part of the Driver: Parallel Lines Wiki Policy. Please remember to follow the policy in order to make the Driver: Parallel Lines Wiki tidier, and to avoid any sanctions, such as Warnings or Blocks. Thanks! |
The Manual of Style for mission pages. Please note this is generally supplied as part of a policy, however warnings are not given if users fail to follow the MOS, unlike policy installments. Please read thoroughly.
Contents[]
Generally, mission pages are usually over 5,000 bytes in size, and to be qualified as article worthy, they must have all available/required sections (see more for details on requirements.)
Infobox[]
The infobox is a template fitted on the right hand side of the article which supplies the necessary information of the mission. We use Template:Infobox mission for this information.
In certain circumstances, if a field is unknown, insert <!--N/A--> in the field to indicate this information has not accidentally left out/forgotten.
There are certain defaults for this feature:
Name[]
The name of the mission is supplied here.
Image[]
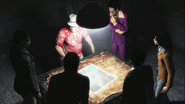
An image summarizing the mission. Gameplay images (generally featuring the third person perspective and HUD interface) are not to be used unless as a last resort - use images from cutscenes (preferably in-game cutscenes rather than surreal Ark VFX cutscenes, to reflect the nature of the game).
Caption[]
A caption of the image isn't necessary, however the user may insert one if they choose - if so, stick to short sentences and/or descriptions.
Appearances[]
This is Driver: Parallel Lines wiki. It is necessary to keep users informed that the mission appears in Driver: Parallel Lines
For[]
This field lists who supplies the mission for TK - Not TK himself (unless it is a single-handed mission). If multiple people are seen to supply the mission (for example, bosses and voices), note in small writing, in brackets, a title of the character.
Era[]
Supply a link to the era in which the mission is played in. List as "Both" if it appears in both eras.
Location[]
Note and/or list location(s) the mission is played in. Specify boroughs and districts if possible. Also note in small writing, in brackets, when this area is visited if multiple are listed.
Target[]
The target of the mission. This is a noun, be it abstract through proper. This is not an objective (continue reading, to do).
Fail[]
Conditions of Mission failure. List all possible ways the player can fail the mission.
Todo[]
List the objectives of the mission. IMPORTANT: These objectives are those seen on screen, and reflect the instructions the game supplies rather than wiki contributor-advised instructions.
Two types of objectives are supplied on screen:
- Pre Mission
List pre-mission objectives first; these are those listed before the mission begins.
'''Pre-Mission:'''<br>
{{BP|mission=y}}Instruction 1
{{BP|mission=y}}Instruction 2
{{BP|mission=y}}Instruction 3<br><br>
Two line breaks are to be listed after the last instruction (see above).
- Intra Mission
List intra-mission objectives after pre-missions; these are those that are displayed as the mission progresses.
These instructions use the {{Anchor}} template, allowing them to anchor to the objectives section of the page so the player can get an detailed walkthrough of each individual objective. This means users have to use a page anchor name, [[#obj1, so the objectives are linked. We also list these instructions in gold to distinguish them from other objectives, using <font color="gold">. When using these anchor links, be careful and make sure to increase the number of the anchor as the objective list expands. Make sure the {{Anchor}} template used under the "Objectives" section of the page has parameters which correspond to the number of the objective anchor link.
See example:
'''Intra-Mission:'''<br>
{{BP|mission=y}}[[#obj1|<font color="gold">Instruction 1.</font>]]
{{BP|mission=y}}[[#obj2|<font color="gold">Instruction 2.</font>]]
{{BP|mission=y}}[[#obj3|<font color="gold">Instruction 3.</font>]]
...Will link to the following, found under the "Objectives" section of the page:
:{{anchor|obj1}}'''<font color="gold">Instruction 1.</font>''' [[#1|[Back to top]]]
*Detailed walkthrough for instruction 1.

:{{anchor|obj2}}'''<font color="gold">Instruction 2.</font>''' [[#1|[Back to top]]]
*Detailed walkthrough for instruction 2.

:{{anchor|obj3}}'''<font color="gold">Instruction 3.</font>''' [[#1|[Back to top]]]
*Detailed walkthrough for instruction 3.
Reward[]
Rewards are nouns - objects. Weapons, vehicles, or cash. Not missions unlocked (unless the mission is unlocked as part of a prize rather than a storyline).
Unlocks[]
The next mission unlocked. Multiple missions may be unlocked (typically 3 unlocked at once). If a mission is not necessarily unlocked, it may instead lay alongside (continue reading).
Alongside[]
Missions which can be played inline with other missions; missions which are alongside have the mission they are unlocked by in common - mutual.
Unlockedby[]
The mission (usually previous mission) which unlocked the mission the article is written on.
Example[]
Example taken from Gift Wrapped. The full template can be found here.
{{Infobox mission
|name = Gift Wrapped
|image = File:GiftWrapped-DPL-BodyguardsTalking.png
|game = ''[[Driver: Parallel Lines]]''
|for = [[Candy]]
|era = [[1978 Era]]
|location = [[La Guardia]], [[Queens]]
|target = Planting a bomb in the [[Colombians]]'s bodyguard [[Land Roamer|car]].
|fail = {{BP|mission=y}}[[TK]] dies.
{{BP|mission=y}}TK arrested.
{{BP|mission=y}}Bodyguard's car destroyed.
{{BP|mission=y}}Bodyguard's car damaged too much.
{{BP|mission=y}}Time up.
{{BP|mission=y}}Guards of car park become suspicious. <!--Fact?-->
|reward = <!--nothing-->
|unlocks = {{BP|mission=y}}[[Kidnap]]
|unlockedby = [[Circuit Breaker]]/[[Jail Break]]
|todo=
'''Pre-Mission:'''<br>
{{BP|mission=y}}Find a way into the secure car park.
{{BP|mission=y}}Steal the bodyguard's car.
{{BP|mission=y}}Get the bomb fitted.
{{BP|mission=y}}Return the car before he returns.
{{BP|mission=y}}Don't wreck it.<br><br>
'''Intra-Mission:'''<br>
{{BP|mission=y}}[[#obj1|<font color="gold">Get the car from the parking lot.</font>]]
{{BP|mission=y}}[[#obj2|<font color="gold">Get to Phoenix Autos in Jamaica and get the bomb fitted.</font>]]
{{BP|mission=y}}[[#obj3|<font color="gold">Go see the guy in the booth.</font>]]
{{BP|mission=y}}[[#obj4|<font color="gold">Drive into the garage to fit the bomb.</font>]]
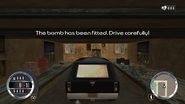
{{BP|mission=y}}[[#obj5|<font color="gold">The bomb has been fitted. Drive carefully!</font>]]
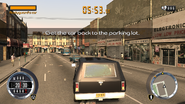
{{BP|mission=y}}[[#obj6|<font color="gold">Get the car back to the parking lot.</font>]]
{{BP|mission=y}}[[#obj7|<font color="gold">You got the car back in time. Now get out of here!</font>]]
}}
Quote[]
If the mission has a significant/meaningful quote, apply it underneath the infobox in the designated template
Example[]
 Hey, man, Slink here - about that opportunity. There's a set of wheels to my name beached up in Hunt's Point. Go collect it and fix it up. Consider this your interview. Then we'll take some more.
- ―Slink pre-mission.
{{Quote|Hey, man, Slink here - about that opportunity. There's a set of wheels to my name beached up in Hunt's Point. Go collect it and fix it up. Consider this your interview. Then we'll take some more.|[[Slink]] pre-mission.|Yes}}
Important: |Yes}} simply gives the quote a black background. Missing out this and and inserting a hex color in another field will give it an alternative color:
{{Quote|Hey, man, Slink here - about that opportunity. There's a set of wheels to my name beached up in Hunt's Point. Go collect it and fix it up. Consider this your interview. Then we'll take some more.|[[Slink]] pre-mission.||#hexcolor}}
The Lead[]
The lead is an introductory description, to be placed directly underneath the infobox in the source editor - it appears to the left of it. This identifies the mission name and the game it appears in. The typical style for this is: The Mission Name is a mission in Driver: Parallel Lines.
Plot[]
Under this section, an advanced third-person description of the plot of the mission is written. This should describe the game as if it were a real life scenario, and should be written in the tense each part of the plot is given in - past tense for information given before the mission, present tense for discussing what happens during the mission, and future tense for information which is supplied either after the mission or in the next mission entirely. The writing style will differ from the "Objectives" section as the plot is written as a story rather than a walkthrough or review of the mission. Characters should be referred to at all times, "the player" should not be mentioned.
Objectives[]
The Objectives heading serves as a walkthrough of the mission, as well as a description of what occurs, in detail during the mission. It offers more detail than the plot would offer. The Objectives, as already mentioned, correspond to the Intra-Mission Objectives found in the infobox, and as such, relate to the on-screen objectives found in game, rather than hand-made checkpoints.
Example[]
- Get the car from the parking lot. [Back to top]
- Once the player starts the mission, and the first cutscene is played through, the player will spawn in the last vehicle they were in, outside the parking lot required to gain access to. The player will need to...
:{{anchor|obj1}}'''<font color="gold">Get the car from the parking lot.</font>''' [[#1|[Back to top]]]
*Once the player starts the mission, and the first cutscene is played through, the player will spawn in the last vehicle they were in, outside the parking lot required to gain access to. The player will need to...
This objective corresponds to the objective "obj1" linked in the infobox, using the anchor tool. The text should be stylized as such, in gold, bold, and offer another anchor link to the top of the page. Important: Use {{anchor|1}} at the top of every mission page if Objectives are given on the page, in order for "Back to top" to function correctly.
Pre-Mission Instructions[]
The Pre-Mission Instructions is another section dedicated to in-game instructions, but instead refers to those supplied pre-mission, on one screen. A file link to an image of the on-screen instructions list is necessary, and a numbered list of the objectives.
Example[]
- Find a way into the secure car park.
- Steal the bodyguard's car.
- Get the bomb fitted.
- Return the car before he returns.
- Don't wreck it.
==[[:File:GiftWrapped-DPL-Objectives.png|Pre-Mission Instructions]]==
#Find a way into the secure car park.
#Steal the bodyguard's car.
#Get the bomb fitted.
#Return the car before he returns.
#Don't wreck it.
{{Clr}}
Important: Use Use {{Clr}} to shift any details below the section. Use Use [[:File: to insert a link to a file, rather than the file itself.
Gallery[]
The next section is extremely important. As well as containing images and videos of the mission, it must contain a vital step-by-step walkthrough of the mission with essential pictures of on-screen objectives, cutscenes and rewards. It also requires captions for each.
The wiki uses Tabbers to differentiate between videos and images. We also use {{Header}} templates to separate post mission, walkthrough and cutscene galleries.
Take a look at the following example:
Example[]
Pre-Mission Cutscene
Walkthrough
<tabber>
Gallery=
{{Header|Pre-Mission Cutscene}}
<gallery position="center">
MissionName(Cutscene)-DPL-Description.png|Cutscene captioning.
</gallery>
{{Header|Walkthrough}}
<gallery position="center">
GiftWrapped-DPL-Objectives.png|Mission objectives.
Pictures of the mission walkthrough|And their captions.
GiftWrapped-DPL-JobDone.png|Job done.
</gallery>
|-|
Videos=
<gallery position="center">
Walthroughs|Walthrough.
MissionName-DPL-Lowdown(Video)|Lowdown.
Scenes|Cutscenes.
</gallery>
</tabber>
Important: Galleries are to be centered.
Important: "Cutscene" refers to Ark VFX screening.
Transcript[]
The transcript documents the script spoken by characters during the mission. On the wiki, we have a specific template to help deal with this:
Example[]
Transcript[]
| Pre-Mission |
| Slink | Hey, man, Slink here - about that opportunity. There's a set of wheels to my name beached up in Hunt's Point. Go collect it and fix it up. Consider this your interview. Then we'll take some more. |
==Transcript==
{{Transcript|
{{TranscriptHeader|Pre-Mission}}
{{TranscriptLine
|name= [[Slink]]
|dialogue= Hey, man, Slink here - about that opportunity. There's a set of wheels to my name beached up in Hunt's Point. Go collect it and fix it up. Consider this your interview. Then we'll take some more.
}}
}}
Put simply, the template consists of the template box itself, which creates the start and end surrounds of the content box. It also consists of the headers, which identify new lines/parts of dialogue, and it contains the transcript line, which lists the name of the character(s) and the dialogue spoke by them. For each line of dialogue spoken by characters consecutively, simply reproduce the TranscriptLine template within the Transcript box, underneath the relevant TranscriptHeader.
Trivia[]
- Trivia is unimportant information that the user may find interesting but not necessarily important. This wiki is welcome to trivia, but blindly obvious trivia, or trivia already noted in detail in the previous descriptions is not welcome.
See also[]
- Similar missions - description.
[]
The navbox is to be fitted to all mission articles.
{{Navbox missions PL}}
Template:Navbox missions PL
Categories[]
- The mission category should be added.
- The mission era category should be added.

